Embedded Development Board Learning
Visual Studio Code for ARM with CMake #4 J-Link
Date: febrero 6, 2023
Author: Guillermo Garcia
Categories: Visual Studio Code Tags: Development tools
In the previous article, Visual Studio Code for ARM with CMake #3 Toolchain CMake, we configured the CMake build environment to obtain an executable file ready for download to our NUCLEO-G071RB board. In this article, we will configure the J-Link tools for code downloading.
Table of Contents
Convert ST-Link to J-Link
Our NUCLEO-G071RB board comes with an integrated debugger on the development board, which is specialized for STM32 software tools. For greater portability, we will use SEGGER software tools.
The ST-Link V2 debugger integrated into our hardware can be converted into a J-Link to achieve this, it is only necessary to change the debugger’s firmware.
ST Link Reflash Utility
To change the firmware on our ST-Link debugger, we will use a SEGGER tool called ST-Link Reflash Utility.
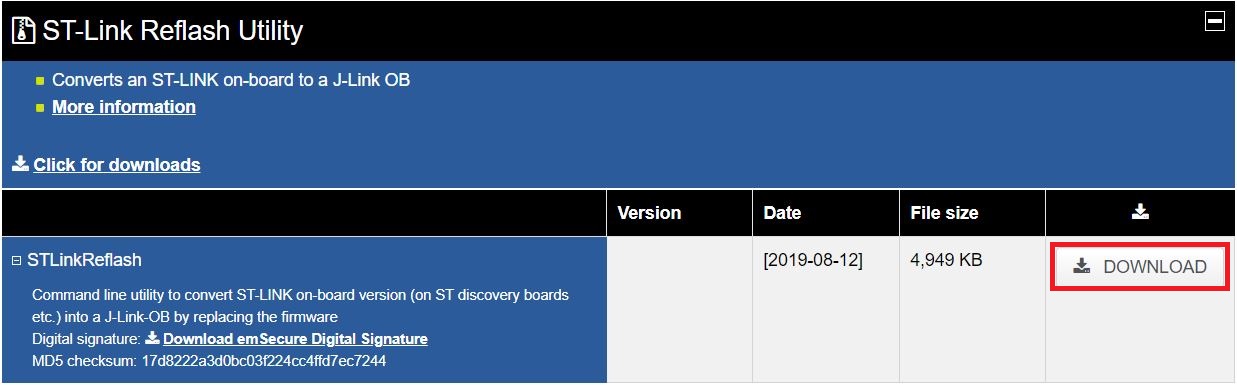
We download an executable file STLinkReflash.exe with a Script that allows us to install the firmware necessary for the conversion.
(c) 2016 SEGGER Microcontroller GmbH & Co. KG    www.segger.com
STLinkReflash compiled Aug 12 2019 10:30:05

The following terms come from SEGGER Microcontroller GmbH & Co. KG ("SEGGER")
You must agree to them in order to proceed.

=============================================================================
* IMPORTANT *
This utility enables You to replace the firmware of an existing ST-LINK
on-board with firmware from SEGGER that makes the ST-LINK on-board
behave J-Link compatible. You do this replacement at Your own risk.
Though extremely unlikely, You are aware that the replacement process may
result in an unusable ST-LINK on-board. The utility and firmware from SEGGER
are provided on an as-is basis and come without any warranty
and without support.
You further agree to only use the firmware provided by SEGGER via this utility,
within the bounds of the license stated on the download page:
https://www.segger.com/jlink-st-link.html
Except as expressly set forth in this agreement,
the Agreement remains unchanged and continues in full force and effect.

=============================================================================

I hereby accept the terms provided by SEGGER.
(A)ccept / (D)ecline
Selection>A
We connect the board and select option 1 to perform the firmware change.
At the request of STMICROELECTRONICS ("ST"), the below
"Amendment to Evaluation Board License Agreement" has been added
to this utility. You must agree to this amendment in order to proceed.

=============================================================================
* IMPORTANT *
When You purchased Your STMICROELECTRONICS ("ST") Evaluation Board, You entered
into an Evaluation Board License Agreement ("Agreement") with ST.
You may install the SEGGER J-Link software ("J-Link") onto Your ST
Evaluation Board only if You  agree to this amendment ("Amendment")
of the Agreement.
STMICROELECTRONICS ("ST") hereby authorizes You to install
SEGGER J-Link software ("J-Link") onto Your ST Evaluation Board,
as an exception to the terms and conditions of the Agreement.
You acknowledge and agree that J-Link is provided solely by SEGGER,
and not by ST. You acknowledge and agree that ST does not endorse, recommend,
nor provide any assurance or warranty, whether express
or implied, in relation to J-Link or its use with Your ST Evaluation Board.
You acknowledge and agree that ST shall not be liable for any direct, indirect,
special, incidental or consequential damages resulting from Your use of J-Link,
even if advised of the possibility thereof.
This Amendment shall be governed, construed and enforced in accordance with the
laws of Switzerland.
Except as expressly set forth in this Amendment, the Agreement remains unchanged
and continues in full force and effect.

=============================================================================

I hereby accept the amendment to the Evaluation Board License Agreement
provided by STMICROELECTRONICS ("ST")(A)ccept / (D)ecline
Selection>A

[0] Quit
[1] Upgrade to J-Link
[2] Update J-Link firmware
[3] Restore ST-Link
Selection>1

Preparing for FW update (can take up to 10 seconds)...O.K.
Identifying ST-LINK variant...O.K.: ST-LINK/V2-1
Performing firmware update...O.K.
J-Flash Lite
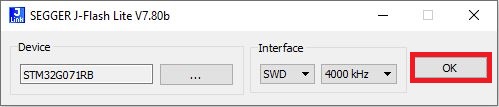
To download our executable file to the NUCLEO-G071RB board, we will use a SEGGER software tool called J-Flash Lite, which was previously installed in the article Visual Studio Code for ARM with CMake #1 Installation.
We select the MCU and the SWD interface, then click OK.
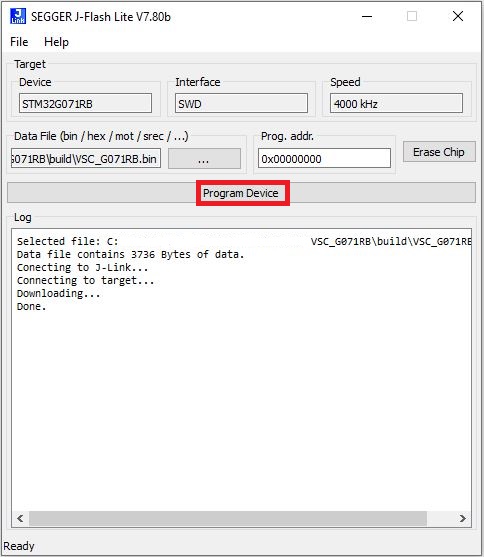
We load the path where our executable file is in Data File and select Program Device.
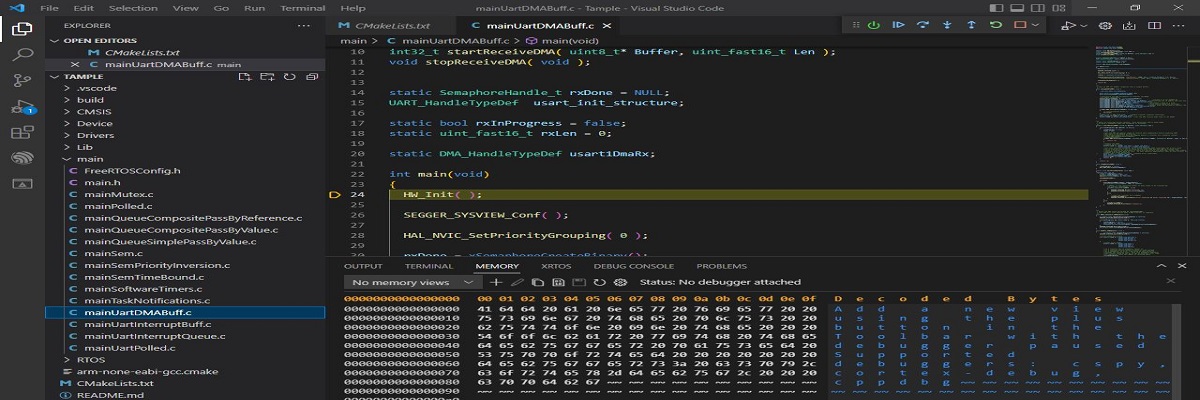
Now we can see our NUCLEO-G071RB board working with the simple Toggle of the LED4.
For a development environment we need to be able to compile, flash and debug from the same environment, in this case Visual Studio Code.
We will create a J-Link commander file with the commands necessary to download our executable file automatically using JLink.exe.
J-Link commander File
We can run JLink.exe from Visual Studio Code. To specify what action to perform, we need to use commands, so we will create a file to instruct it to program the NUCLEO-G071RB board automatically.
The available commands can be found in the J-Link Commander documentation, where a description is provided.
Run Flash
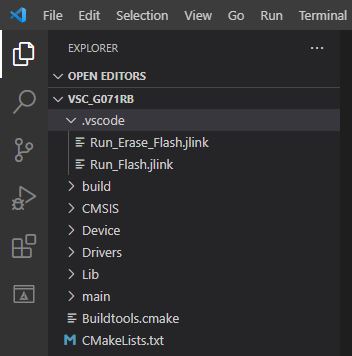
In the .vscode folder of our project we will create a file that I will call Run_Flash.jlink with the following content:
si 1
speed 4000
r
h
loadbin  C:VSC_G071RB\build\VSC_G071RB.bin,0x08000000
rx 100
exit
The most important thing in the file is to put the path where our executable file is located in binary format as well as the initial flash address from where the programming will be done.
To program our board, we open a terminal in Visual Studio Code to run the following command indicating our hardware and the path of the J-Link Commander file.
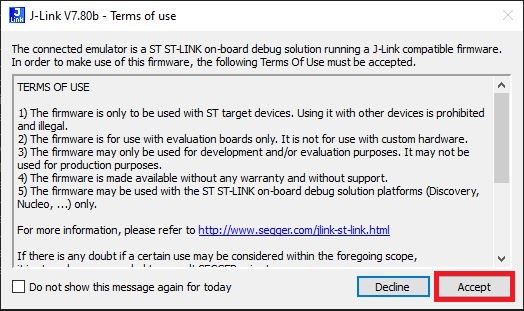
We execute the command and this begins the programming on the board. On the first occasions we will see the following window, we just have to accept for the process to continue.
C:\VSC_G071RB>JLink.exe -device STM32G071RB -CommandFile C:\VSC_G071RB\.vscode\Run_Flash.jlink
SEGGER J-Link Commander V7.80b (Compiled Sep 20 2022 17:11:36)
DLL version V7.80b, compiled Sep 20 2022 17:10:13


J-Link Command File read successfully.
Processing script file...
J-Link>si 1
J-Link connection not established yet but required for command.
Connecting to J-Link via USB...O.K.
Firmware: J-Link STLink V21 compiled Aug 12 2019 10:29:20
Hardware version: V1.00
J-Link uptime (since boot): N/A (Not supported by this model)
S/N: 779525353
VTref=3.300V
Selecting SWD as current target interface.
J-Link>speed 4000
Selecting 4000 kHz as target interface speed
J-Link>r
Target connection not established yet but required for command.
Device "STM32G071RB" selected.


Connecting to target via SWD
InitTarget() start
InitTarget() end
Found SW-DP with ID 0x0BC11477
DPv0 detected
CoreSight SoC-400 or earlier
Scanning AP map to find all available APs
AP[1]: Stopped AP scan as end of AP map has been reached
AP[0]: AHB-AP (IDR: 0x04770031)
Iterating through AP map to find AHB-AP to use
AP[0]: Core found
AP[0]: AHB-AP ROM base: 0xF0000000
CPUID register: 0x410CC601. Implementer code: 0x41 (ARM)
Found Cortex-M0 r0p1, Little endian.
FPUnit: 4 code (BP) slots and 0 literal slots
CoreSight components:
ROMTbl[0] @ F0000000
[0][0]: E00FF000 CID B105100D PID 000BB4C0 ROM Table
ROMTbl[1] @ E00FF000
[1][0]: E000E000 CID B105E00D PID 000BB008 SCS
[1][1]: E0001000 CID B105E00D PID 000BB00A DWT
[1][2]: E0002000 CID B105E00D PID 000BB00B FPB
Cortex-M0 identified.
Reset delay: 0 ms
Reset type NORMAL: Resets core & peripherals via SYSRESETREQ & VECTRESET bit.
Reset: Halt core after reset via DEMCR.VC_CORERESET.
Reset: Reset device via AIRCR.SYSRESETREQ.
J-Link>h
PC = FFFFFFFE, CycleCnt = 00000000
R0 = FFFFFFFF, R1 = FFFFFFFF, R2 = FFFFFFFF, R3 = FFFFFFFF
R4 = FFFFFFFF, R5 = FFFFFFFF, R6 = FFFFFFFF, R7 = FFFFFFFF
R8 = FFFFFFFF, R9 = FFFFFFFF, R10= FFFFFFFF, R11= FFFFFFFF
R12= FFFFFFFF
SP(R13)= FFFFFFFC, MSP= FFFFFFFC, PSP= FFFFFFFC, R14(LR) = FFFFFFFF
XPSR = F1000000: APSR = NZCVq, EPSR = 01000000, IPSR = 000 (NoException)
CFBP = 00000000, CONTROL = 00, FAULTMASK = 00, BASEPRI = 00, PRIMASK = 00
FPU regs: FPU not enabled / not implemented on connected CPU.
J-Link>loadbin  C:\VSC_G071RB\build\VSC_G071RB.bin  ,0x08000000
'loadbin': Performing implicit reset & halt of MCU.
Reset: Halt core after reset via DEMCR.VC_CORERESET.
Reset: Reset device via AIRCR.SYSRESETREQ.
Downloading file [C:\VSC_G071RB\build\VSC_G071RB.bin]...
J-Link: Flash download: Bank 0 @ 0x08000000: 1 range affected (4096 bytes)
J-Link: Flash download: Total: 0.259s (Prepare: 0.071s, Compare: 0.071s, Erase: 0.000s, Program & Verify: 0.090s, Restore: 0.025s)
J-Link: Flash download: Program & Verify speed: 44 KB/s
O.K.
J-Link>rx 100
Reset delay: 100 ms
Reset type NORMAL: Resets core & peripherals via SYSRESETREQ & VECTRESET bit.
Reset: Halt core after reset via DEMCR.VC_CORERESET.
Reset: Reset device via AIRCR.SYSRESETREQ.
J-Link>exit

Script processing completed.

OnDisconnectTarget() start
OnDisconnectTarget() end
Run Erase Flash
In the same way we will create another file to erase all the flash memory on the board, we will create the file in the .vscode folder called Run_Erase_Flash.jlink with the following content:
si 1
speed 4000
r
h
Erase 0x08000000, 0x0801FFFF
rx 100
exit
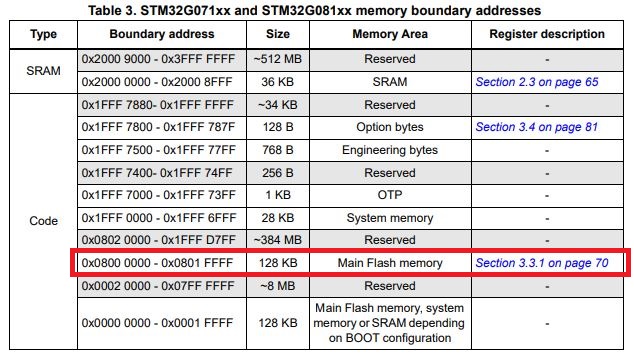
The Erase command needs to know the flash memory mapping in the MCU. The start and end address define the section where the flash memory erasure will be performed.
This depends on the flash memory size of the hardware in question in our case for the NUCLEO-G071RB board it is as follows:
To clear the memory, execute the following command from the terminal:
We see the flash erase process in the terminal.
C:\VSC_G071RB>JLink.exe -device STM32G071RB -CommandFile C:\VSC_G071RB\.vscode\Run_Erase_Flash.jlink
SEGGER J-Link Commander V7.80b (Compiled Sep 20 2022 17:11:36)
DLL version V7.80b, compiled Sep 20 2022 17:10:13


J-Link Command File read successfully.
Processing script file...
J-Link>si 1
J-Link connection not established yet but required for command.
Connecting to J-Link via USB...O.K.
Firmware: J-Link STLink V21 compiled Aug 12 2019 10:29:20
Hardware version: V1.00
J-Link uptime (since boot): N/A (Not supported by this model)
S/N: 779525353
VTref=3.300V
Selecting SWD as current target interface.
J-Link>speed 4000
Selecting 4000 kHz as target interface speed
J-Link>r
Target connection not established yet but required for command.
Device "STM32G071RB" selected.


Connecting to target via SWD
InitTarget() start
InitTarget() end
Found SW-DP with ID 0x0BC11477
DPv0 detected
CoreSight SoC-400 or earlier
Scanning AP map to find all available APs
AP[1]: Stopped AP scan as end of AP map has been reached
AP[0]: AHB-AP (IDR: 0x04770031)
Iterating through AP map to find AHB-AP to use
AP[0]: Core found
AP[0]: AHB-AP ROM base: 0xF0000000
CPUID register: 0x410CC601. Implementer code: 0x41 (ARM)
Found Cortex-M0 r0p1, Little endian.
FPUnit: 4 code (BP) slots and 0 literal slots
CoreSight components:
ROMTbl[0] @ F0000000
[0][0]: E00FF000 CID B105100D PID 000BB4C0 ROM Table
ROMTbl[1] @ E00FF000
[1][0]: E000E000 CID B105E00D PID 000BB008 SCS
[1][1]: E0001000 CID B105E00D PID 000BB00A DWT
[1][2]: E0002000 CID B105E00D PID 000BB00B FPB
Cortex-M0 identified.
Reset delay: 0 ms
Reset type NORMAL: Resets core & peripherals via SYSRESETREQ & VECTRESET bit.
Reset: Halt core after reset via DEMCR.VC_CORERESET.
Reset: Reset device via AIRCR.SYSRESETREQ.
J-Link>h
PC = 08000350, CycleCnt = 00000000
R0 = FFFFFFFF, R1 = FFFFFFFF, R2 = FFFFFFFF, R3 = FFFFFFFF
R4 = FFFFFFFF, R5 = FFFFFFFF, R6 = FFFFFFFF, R7 = FFFFFFFF
R8 = FFFFFFFF, R9 = FFFFFFFF, R10= FFFFFFFF, R11= FFFFFFFF
R12= FFFFFFFF
SP(R13)= 20009000, MSP= 20009000, PSP= FFFFFFFC, R14(LR) = FFFFFFFF
XPSR = F1000000: APSR = NZCVq, EPSR = 01000000, IPSR = 000 (NoException)
CFBP = 00000000, CONTROL = 00, FAULTMASK = 00, BASEPRI = 00, PRIMASK = 00
FPU regs: FPU not enabled / not implemented on connected CPU.
J-Link>Erase 0x08000000, 0x0801FFFF
'erase': Performing implicit reset & halt of MCU.
Reset: Halt core after reset via DEMCR.VC_CORERESET.
Reset: Reset device via AIRCR.SYSRESETREQ.
Erasing selected range...
J-Link: Flash download: Total time needed: 1.594s (Prepare: 0.079s, Compare: 0.000s, Erase: 1.475s, Program: 0.000s, Verify: 0.000s, Restore: 0.038s)
J-Link: Flash download:
Flash sectors within Range [0x08000000 - 0x0801FFFF] deleted.
Erasing done.
J-Link>rx 100
Reset delay: 100 ms
Reset type NORMAL: Resets core & peripherals via SYSRESETREQ & VECTRESET bit.
Reset: Halt core after reset via DEMCR.VC_CORERESET.
Reset: Reset device via AIRCR.SYSRESETREQ.
J-Link>exit

Script processing completed.

OnDisconnectTarget() start
OnDisconnectTarget() end
Now we are closer to having the environment ready, to download the code to the board we need to run the command that will invoke a J-Link Commander file but it is not yet fully automatic because it is necessary to type the command just like the CMake commands to start the compilation.
We will see how to automate these commands from Visual Studio Code.
Deja una respuesta